reevaluating eggplant cooking methods

Why Everything You’ve Heard About Cooking Eggplant Might Be Wrong

Most eggplant cooking advice is flat-out wrong. Salting to remove bitterness? Unnecessary with fresh eggplants. Peeling the skin? You’re tossing away nutrients and flavor. Those fussy preparation rituals are outdated myths that waste time and strip this versatile vegetable of its natural qualities. High heat is your friend, and modern eggplants don’t need a spa treatment before cooking. The truth about proper eggplant preparation might surprise even seasoned chefs.

cooking eggplant myths debunked

Why do so many home cooks treat eggplant like it needs a spa treatment before hitting the pan? The truth is, most of those fussy preparation steps passed down through generations are about as necessary as a screen door on a submarine.

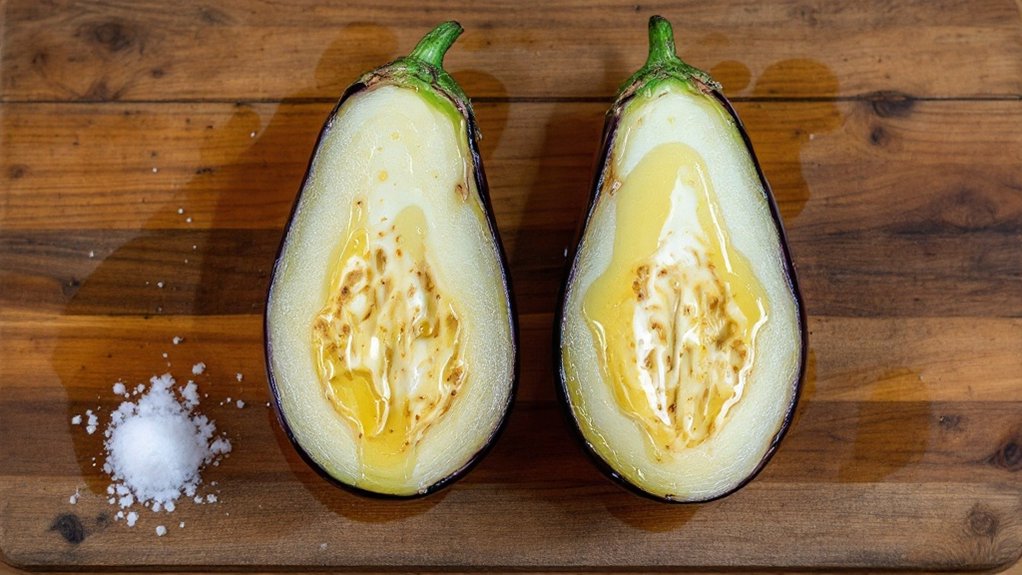
Let’s bust the biggest myth right now: that whole salting ritual to remove bitterness? Completely unnecessary with fresh eggplant. If you’re choosing firm, glossy eggplants that feel heavy for their size, you’re already ahead of the game. Those are the good ones. The bitter ones? Those are the sad, overripe specimens sitting too long in your produce drawer.

Science tells us something interesting about eggplant. Its structure naturally breaks down during cooking, releasing air and becoming tender. No elaborate pre-treatment required. Sure, salting has its place – it can reduce oil absorption during frying and make the texture more tender. But it’s not the culinary commandment many think it is.

Modern eggplant varieties break down naturally during cooking. Skip the fussy pre-treatments – high heat is all you really need.

The peel debate is another head-scratcher. People religiously strip their eggplants naked when that purple skin adds wonderful texture and visual appeal. It’s like taking the crust off perfectly good bread. Chinese eggplant varieties are particularly excellent for keeping the skin on. The beautiful purple color comes from anthocyanins present in the vegetable.

SEE ALSO  Why Your Dull Knife Is Ruining Dinner — And Which Chef’s Blades Actually Work

And about that aluminum pan warning? Yes, it’s real. Eggplant and aluminum create an unfortunate browning situation. Nobody wants that.

What actually matters is heat. High heat. Not that timid, medium-temperature approach that leaves you with sad, rubbery slices. Blast it with heat, and watch the magic happen. Stir-frying, grilling, roasting – all fantastic methods that don’t require a salt shower first.

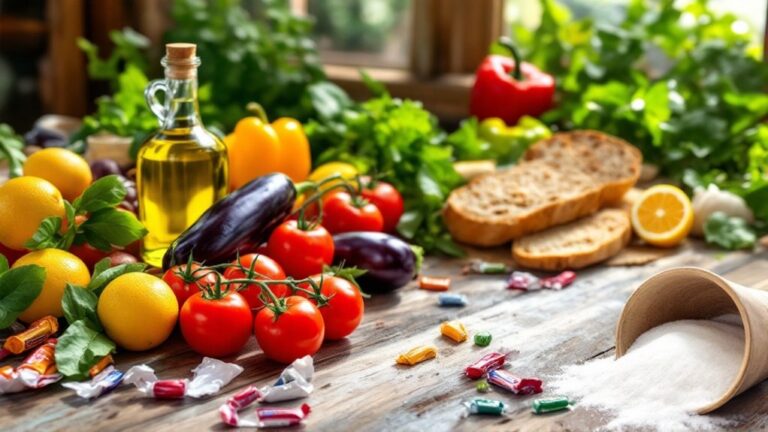
The humble eggplant packs quite a nutritional punch too. Low in calories, high in fiber, loaded with vitamins C and K, and packed with antioxidants that might help fight cancer. It’s basically a superfood disguised as a weird purple vegetable.

From Middle Eastern baba ganoush to Italian parmigiana, this versatile ingredient deserves better than being subjected to unnecessary prep work. Sometimes the best cooking advice is simply to do less.

Similar Posts

  • Peppermint Chocolate Chip Cookies ⋆ My Sparkling Life

    This post may contain affiliate links which fund the My Sparkling Life blog.
    Welcome back to our 12 Days of St. Patrick’s Day Recipes & Crafts!! I am excited to share day four’s recipe from This N That with Olivia. She is sharing a delicious Peppermint Chocolate Chip Cookies Recipe.
    This recipe uses classic ingredients found in pretty much every kitchen and the cookies turn out GREEN which is perfect for St. Patrick’s Day. Don’t they look delicious?! Check it out HERE.

  • Mason Jar Chocolate Cake: The Shocking Truth About Why 73% of Pinterest Recipes Could Shatter Your Oven

    With the holidays approaching quickly I decided to get into the kitchen and do a little pre-holiday baking..you know hone up on my skills and pull out recipes I haven’t done in a while. My boys were super excited when I pulled out my chocolate cake recipe and were even more excited when they saw that they get their own individual mason jars!
    The boys love when I make individual servings of desserts, they feel special, like I made it just for them. You can individualize each one to the person’s taste…in this case with the toppings.
    I personally LOVE mason jars! They are so versatile. You can create so many things in them..use them personal servings, drinks, for many crafts, and storage solutions. I just love the newest edition to the Ball family…the Purple Heritage Collection. They are so pretty and perfect for a Halloween craft! I decided to use one to make a Shrunken Severed Head In A Jar. Start by finding an image you want to use and use a service like canva.com to put your image into a 3×5 or 4×6 template (if you choose 4×6, shrink your image down a little bit like I did below).
    Once you pick out what image you are going to use and have it the size you need, print it onto your photo paper/printer paper (you’ll want 2 of them). After you print them, cut them out and laminate. I got my laminator at hobby lobby for 19.99 and my laminating sheets from lakeshore learning (hobby lobby has sheets, but the ones from lakeshore are thicker).
    To create the Liquid preservatives mix 1 drop of red, 1 drop green, 1 drop yellow food coloring and fill jar with water. Place your heads in the jar and fill with more water (as needed). Put on lid and enjoy your shrunken severed head in a jar!
    Lets get back to the Mason Jar Chocolate Cake…
    You will need:
    2c Flour
    2c Sugar
    1c Sweetened Cocoa Powder ( I use Ghirardelli)
    2tsp Baking Powder
    1 1/2tsp Baking Soda
    1tsp Salt
    1c Milk
    1/2c Vegetable Oil
    2 Eggs
    2tsp Vanilla
    1c Water
    Instructions
    Preheat oven to 350º F.
    Prepare your cake pan by spraying with baking spray or greasing and flouring
    Add flour, sugar, cocoa, baking powder, baking soda, salt to a small bowl. Whisk through to combine.
    Combine milk, vegetable oil, eggs, and vanilla into large bowl and mix together until combined. Reduce speed and slowly add dry ingredients. Mix on medium speed until well combined. Add water to the cake batter. Beat on high speed for about 1 minute to add air to the batter.
    Distribute cake batter evenly in the pan.
    Bake for 20-25 minutes.
    Remove from the oven and allow to cool.
    Once cooled take a round cookie cutter and cut out pieces of cake and layer them into your Ball mason jars.
    Top with your choice of icing. You can check out my recipe for Buttercream Icing.
    To add a bit of flavor, my boys love when I do this…instead of water add in Dr. Pepper or Root Beer. My favorite is Cherry Dr. Pepper!
    WORLDS BEST MASON JAR CHOCOLATE CAKE
    2015-10-15 19:12:06
    Serves 8
    A delicious and moist chocolate cake in individual Ball mason jars.
    2c Flour
    2c Sugar
    1c Sweetened Cocoa Powder ( I use Garadelli)
    2tsp Baking Powder
    1 1/2tsp Baking Soda
    1tsp Salt
    1c Milk
    1/2c Vegetable Oil
    2 Eggs
    2tsp Vanilla
    1c Water
    Preheat oven to 350º F.
    Prepare your cake pan by spraying with baking spray or greasing and flouring
    Add flour, sugar, cocoa, baking powder, baking soda, salt to a small bowl. Whisk through to combine.
    Combine milk, vegetable oil, eggs, and vanilla into large bowl and mix together until combined. Reduce speed and slowly add dry ingredients. Mix on medium speed until well combined. Add water to the cake batter. Beat on high speed for about 1 minute to add air to the batter.
    Distribute cake batter evenly in the pan.
    Bake for 20-25 minutes.
    Remove from the oven and allow to cool.
    Once cooled take a round cookie cutter and cut out pieces of cake and layer them into your Ball mason jars.
    Top with your choice of icing & toppings
    To add a bit of flavor, my boys love when I do this…instead of water add in Dr. Pepper or Root Beer. My favorite is Cherry Dr. Pepper!
    By Becky Fry
    Adapted from Mother’s Recipe
    Adapted from Mother’s Recipe
    My Sparkling Life https://mysparklinglife.com/
    What’s your favorite thing to make with Ball Mason Jars?
    Disclosure of Material Connection: I received one or more of the products or services mentioned above for free in the hope that I would mention it on my blog. Regardless, I only recommend products or services I use personally and believe will be good for my readers. I am disclosing this in accordance with the Federal Trade Commission’s 16 CFR, Part 255: “Guides Concerning the Use of Endorsements and Testimonials in Advertising.”
    Related

  • Make It Monday – Giant Cupcake Cake & Homemade Buttercream Icing

    Last week I showed you how to make a smash cake chair..this week I’m going to share with you my sons smash cake…A Giant Cupcake Cake & Homemade Buttercream Icing!
    Get 2 boxes of your favorite cake mix..we choose chocolate because I was going to use a white background and this would show up the best! Follow the instructions on the box to make mix. Pour mix into your sprayed or greased/floured Giant Cupcake pan (link to amazon, where i got mine). It took us a while to figure out how long to bake it since it is a lot thicker than a traditional cake. It took 55 min to bake through. The cake will be larger than needed you will need to trim to proper size. Tip cake upside down onto a cooling rack to cool before cutting. Once cool you can trim it down to the proper size. Make sure they fit together, if not, trim more.. Now lets make the Icing.. 1 cup softened salted butter 1 cup vegetable shortening 2 lbs confectionery sugar icing coloring (if wanted) Start off by mixing the soft butter and shortening together till nice and creamy on medium speed. Turn the mixer down to the lowest setting and slowly incorporate the powdered sugar into the shortening mixture. Once you have added all the sugar to the mix add in the hot water and the vanilla. Turn the mixer up to medium high speed and continue mixing for 10 minutes until light and fluffy. Add in coloring till you have desired color..we were looking for a rich “batman” yellow..for our little batman Add in coloring (if wanted) This is the coloring we got, found it at walmart Icing the center generously to hold pieces together Put Icing into piping bag (can also be found at walmart) Decorate as desired..I’m not the best at icing..but it works for me The buttercream can be stored at room temperature for up to three days or in the refrigerator for up to two weeks. When you bring it out of the refrigerator let it sit at room temperature for two hours. Than rewhip it for ten minutes to bring it back to life! Set up your little person to enjoy their homemade cake!
    Disclosure: This post may include affiliate links with fund the Mom of 4 Boys blog. No other compensation was received. Please see our disclosure policy for more information.