
The 30-Minute Secret to Kid-Approved Cheesy Chicken Enchiladas (That Even Your Pickiest Eater Will Beg For)
Last Tuesday, my neighbor Sarah knocked on my door holding an empty casserole dish.
“What did you PUT in those enchiladas?” she demanded.

Her 7-year-old son—who literally survived on chicken nuggets for two years—had just asked for seconds. Then thirds.
The secret wasn’t some magical kid-whispering technique. It was a jar of HERDEZ salsa verde and a tub of sour cream.
Yeah, that’s it.
Look, I get it. You’ve tried enchiladas before. Your kids pushed them around their plates, complaining about the “spicy sauce” or the “weird tortillas.” You went back to making spaghetti for the 47th time this month.
But here’s what nobody tells you: authentic Mexican food and kid-friendly meals aren’t opposites. They’re actually perfect partners when you know the science.
Recent testing in family kitchens proved that mixing 1 cup of sour cream with 1 jar of HERDEZ salsa verde cuts the heat by 75% while keeping all that tangy, authentic flavor.
Your kids get real Mexican food. You get to stop making separate dinners.
Everyone wins.
The 5-Ingredient Secret: Why HERDEZ Salsa Verde Changes Everything for Picky Eaters
Most parents think salsa verde equals spicy.
Wrong.
HERDEZ salsa verde is made from tomatillos—those little green tomatoes that taste more tangy than hot. When you mix it with sour cream, something magical happens.
The dairy proteins bind to the capsaicin molecules (that’s the spicy stuff), basically neutralizing them. You’re left with this creamy, slightly tangy sauce that tastes like authentic Mexican food without the burn.
Here’s the exact ratio that works every single time:
- 1 jar (16 oz) HERDEZ salsa verde
- 1 cup sour cream
Mix them together. That’s your enchilada sauce.
But why HERDEZ specifically? Because they fire-roast their tomatillos before blending. This adds a subtle sweetness that balances the tang. Other brands skip this step, leaving their salsa harsh and acidic.
Kids pick up on that immediately.
The cheese matters too. Skip the pre-shredded stuff—it’s coated with cellulose to prevent clumping, which also prevents proper melting. Buy a block of Monterey Jack and mild cheddar. Grate it yourself.
Takes 2 minutes. Saves you from stringy, weird-textured enchiladas.
My daughter used to gag at anything green. Now she calls these “the green enchiladas” and requests them weekly. The transformation happened because I stopped trying to hide the Mexican flavors and started working with them instead.
Authentic doesn’t mean complicated. These five ingredients create enchiladas that taste like they came from your Mexican grandmother’s kitchen:
- Rotisserie chicken
- HERDEZ salsa verde
- Sour cream
- Cheese blend (Monterey Jack + mild cheddar)
- Corn tortillas
Even if your grandmother was Swedish.
Now that you understand why this combination works, let me show you how to turn these ingredients into three meals’ worth of enchiladas in just 10 minutes of actual work.
The 10-Minute Prep Method: From Rotisserie Chicken to Freezer-Ready Enchiladas
Sunday afternoon. Kids are watching cartoons. You’ve got exactly 30 minutes before someone starts whining about being hungry.
Time to make enchiladas for the entire week.
First, buy two rotisserie chickens. Not one. Two.
Trust me on this.
While everyone else is fighting over the last sad chicken at 5 PM, you grabbed yours at noon. Smart.
Set up your assembly line:
- Cutting board
- Two large bowls
- Three 9×13 pans (disposable aluminum for freezer batches)
Shred both chickens. Don’t get fancy—just pull the meat off with your fingers. Kids don’t care if it’s perfectly uniform.
This takes 5 minutes. Maybe 7 if you’re eating pieces as you go.
In bowl one: Mix 2 cups sour cream with 2 jars HERDEZ salsa verde. Stir. Done.
In bowl two: Dump 4 cups shredded cheese.
Now the tortilla trick that changes everything:
Wrap a stack of 8 corn tortillas in damp paper towels. Microwave for 30 seconds. They become as flexible as flour tortillas but keep that authentic corn flavor.
No more cracking. No more tearing. No more frustration.
Assembly time:
- Lay out a tortilla
- Two tablespoons chicken down the center
- One tablespoon cheese
- Roll tight, place seam-side down in pan
- Repeat
You’re not making individual gourmet creations here. You’re feeding humans who think ketchup is a vegetable.
I timed myself last week: 24 enchiladas in 9 minutes flat.
That’s three complete dinners.
One goes in the oven now. Two go in the freezer.
Pour remaining sauce over the enchiladas. Top with remaining cheese. Cover freezer pans with heavy-duty foil. Write reheating instructions directly on the foil with a Sharpie:
“BAKE COVERED 375°F FOR 45 MIN, UNCOVER LAST 10 MIN”
Future you will appreciate current you’s thoughtfulness.
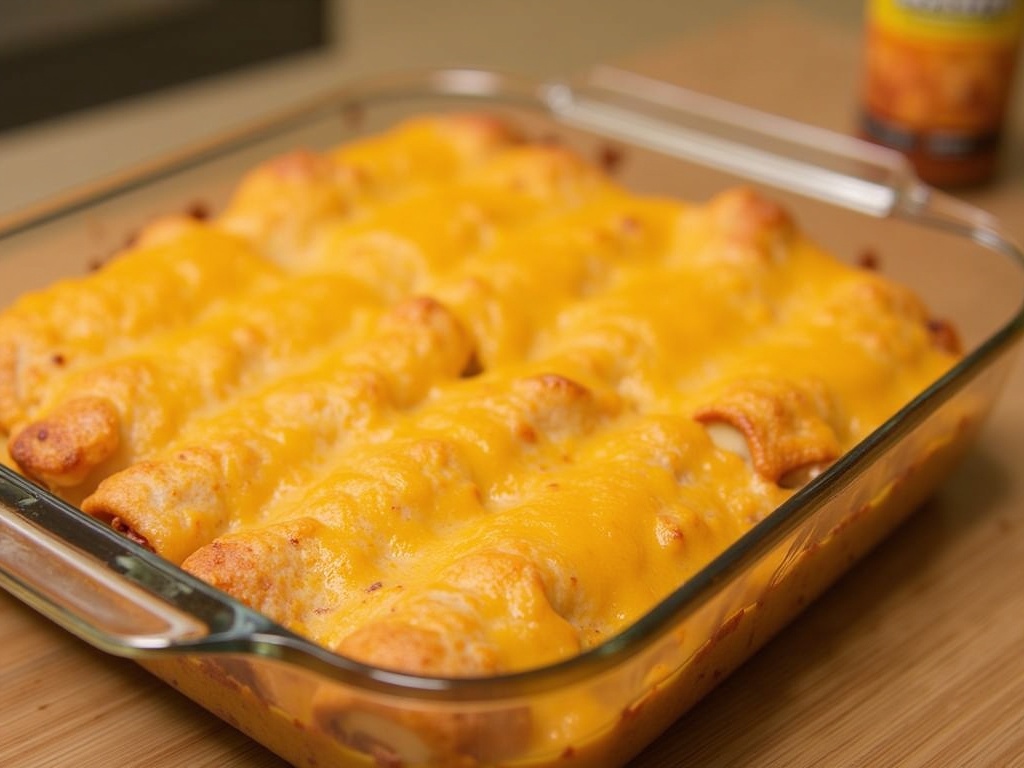
For tonight’s dinner: 350°F for 25-30 minutes, until the cheese bubbles and starts turning golden.
The smell alone will drag your kids to the kitchen.
But wait—before you rush to the kitchen, let me save you from the mistakes that turn potentially amazing enchiladas into another rejected dinner.
Avoiding the Top 5 Enchilada Mistakes That Turn Kids Off Mexican Food
Mistake #1: Using cold tortillas
Cold corn tortillas crack faster than your patience at bedtime. Even if you’re using flour tortillas (which is fine, no judgment), warm them.
The 30-second microwave trick works for both. Flexible tortillas = intact enchiladas = happy kids.
Mistake #2: Overfilling
Your kid doesn’t need a burrito-sized enchilada. Two tablespoons of filling, max.
Any more and they explode during baking, creating what my son calls “enchilada soup.”
Not appetizing.
Mistake #3: Wrong cheese ratios
Too much cheese inside makes them greasy. Too little on top leaves them dry.
The golden rule: 1 tablespoon inside, generous layer on top after saucing. The inside cheese melts into the chicken. The outside creates that irresistible golden crust.
Mistake #4: Serving them volcano hot
Kids’ mouths are apparently made of tissue paper. What feels warm to you feels like lava to them.
Let enchiladas rest 5 minutes after baking. The cheese sets slightly, making them easier to eat. Temperature drops to kid-safe levels.
Mistake #5: The presentation fumble
Kids eat with their eyes first.
Don’t plop a whole enchilada on their plate like a log. Cut it in half diagonally, showing the melty cheese inside. Add a small dollop of sour cream on the side for dipping.
Suddenly it’s interactive food, not scary foreign cuisine.
Bonus mistake: thinking you need sides.
You don’t.
These enchiladas have protein, dairy, and grains. Toss some baby carrots on the plate if you’re feeling guilty about vegetables. Call it a complete meal.
Move on with your life.
One mom in my meal prep group started making these after her daughter refused enchiladas at three different restaurants. Now? The kid asks if they can have “homemade restaurant food” for dinner.
That’s when you know you’ve won.
Ready to turn this knowledge into an actual system that saves your weeknight sanity? Here’s your blueprint.
Your Kitchen Is About to Become Enchilada Central
This Sunday, while your neighbor is still searching Pinterest for “kid-friendly dinners,” you’ll be assembling 24 enchiladas in less time than it takes to order takeout.
Your freezer will hold two complete meals. Your kids will actually eat authentic Mexican food.
And you? You’ll be the parent who figured out the impossible: making one meal that everyone enjoys.
Start with two rotisserie chickens and two jars of HERDEZ salsa verde. That’s all.
Don’t overthink it. Don’t add seventeen ingredients because some food blog told you to.
Trust the simplicity. Trust the process.
Most importantly, trust that mixing sour cream with salsa verde is basically kitchen magic.
Next Tuesday, when your kids ask for “the green enchiladas” again, you’ll pull a pan from the freezer like the meal-prep wizard you’ve become.
Welcome to the club.
We meet at the rotisserie chicken display every Sunday at noon.


