
The Stage 2 Veggie Revolution: Why Your Baby’s Food Deserves More Than Just Sweet Potato
Here’s something wild. Babies in Thailand are slurping down lemongrass-infused vegetable purees at 7 months old. Mexican babies? They’re enjoying mild chili and cumin in their squash by 8 months. Meanwhile, most American parents are stuck in the single-ingredient sweet potato rut, terrified of adding even a pinch of cinnamon.
Look, I get it. The baby food industry has convinced us that bland equals safe. But here’s what they’re not telling you: between 6 and 9 months, your baby’s taste buds are basically wide open for business. Miss this window, and you might be battling a chicken nugget-only phase for the next decade.
I learned this the hard way with my first kid. Kept everything plain, simple, boring. By age three, she wouldn’t touch anything green. With baby number two? Different story. We went full flavor mode during stage 2, and now at four, he’s asking for seconds on Brussels sprouts. Not kidding.
The Myth of Bland: Why Stage 2 is Your Baby’s Culinary Adventure Window
Let me blow your mind real quick. That whole “babies need bland food” thing? Total myth. Research from flavor development studies shows babies between 6-9 months are actually programmed to accept new tastes easier than at any other time in their lives. It’s like their taste buds have a welcome mat out.
Remember that viral TikTok of baby Harper trying her mom’s ginger-carrot puree? Not actual cake, obviously. But carrots with fresh ginger, a touch of nutmeg. Baby demolished it. At 7 months old. The kicker? When they tried plain carrots later, Harper made that face. You know the one.
Here’s what’s actually happening in your baby’s mouth during stage 2 baby food introduction. Those taste buds are multiplying like crazy. Their brain is literally mapping flavors to memories. Give them plain mush, they map mush. Give them cumin-spiced butternut squash? They map adventure.
The research is pretty clear on this. Babies exposed to varied flavors during stage 2 eat more diverse foods as toddlers. We’re talking 40% more vegetable variety by age two. That’s not some made-up stat. That’s from actual pediatric feeding studies.
But here’s where most parents mess up when they make your own baby food veggies stage 2. They think spices equal spicy. Nope. We’re talking warming spices. Cinnamon, ginger, mild curry powder, cumin, coriander. The stuff that makes food interesting, not painful.
I started adding a tiny pinch of cinnamon to sweet potato puree when my second was 6.5 months old. Just a pinch. He loved it so much, he actually started opening his mouth wider. Try getting that reaction from plain peas.
The truth about stage 2 baby food recipes is that single-ingredient purees are kind of like training wheels. Fine for a week or two. But keeping your baby on them for months? That’s like never taking the training wheels off. They’ll learn to ride eventually, sure. But it’ll be way harder than it needs to be.
Now that we’ve established your baby can handle actual flavor, let’s talk about how to make stage 2 baby food at home without spending your entire weekend in the kitchen.
The Freezer Cube Method: Batch Cooking Stage 2 Vegetables Like a Pro Chef
Alright, confession time. When I first heard about the freezer cube method for homemade baby food vegetables, I rolled my eyes so hard. Seemed like one of those Pinterest-perfect ideas that normal humans can’t actually pull off. Then I tried it. Game changer doesn’t even cover it.
Here’s the deal with baby food meal prep. You’re going to cook vegetables exactly once this week. Maybe twice if you’re feeling ambitious. That’s it. Everything else is just mixing frozen cubes like some kind of baby food DJ.
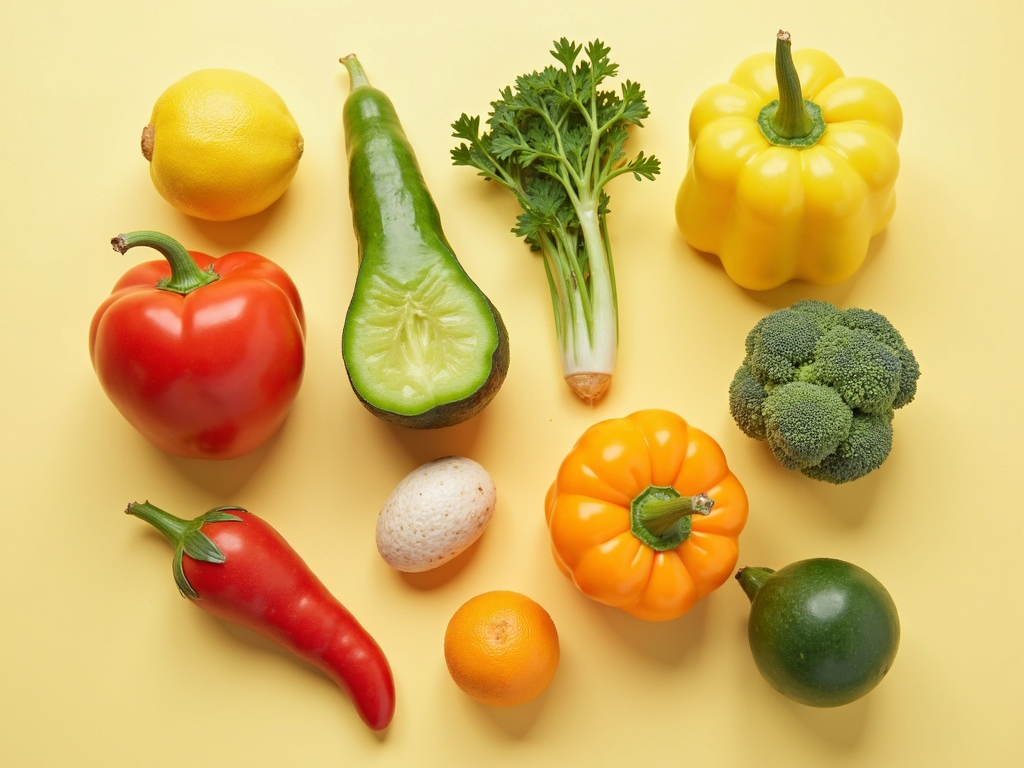
Start with six vegetables for your 6-9 month baby food arsenal. Just six. Sweet potato, carrot, butternut squash, spinach, broccoli, and beets. Why these? They freeze like champions and mix well with basically everything. Plus, nutritional powerhouses. Iron, vitamins, all that good stuff.
The process for homemade vegetable purees is stupid simple. Roast the orange vegetables. Just throw them in the oven at 400°F for 45 minutes. Don’t even peel the sweet potatoes. Seriously. The skin slides right off after roasting, and you keep more nutrients this way.
Steam the greens. Five minutes for spinach, eight for broccoli. That’s it. Overcook them and you’ve got baby food that tastes like sadness.
Here’s where people usually screw up their DIY baby food recipes. They add water. Stop that. Your vegetables have plenty of moisture already. Adding water just dilutes the flavor and nutrients. If you need to thin things out, use the cooking liquid, breast milk, or formula.
Blend each vegetable separately with whatever baby food blender or food processor you’ve got. This is key. Separate. Don’t get cute and start mixing yet. Pour into baby food ice cube trays. The silicone ones work great. Each cube equals about 2 ounces.
Freeze overnight, pop them out, store in labeled freezer bags. Boom. You’ve got freezing homemade baby food for three weeks.
The magic of stage 2 baby food combinations happens at mealtime. Grab two cubes. Maybe carrot and sweet potato today. Tomorrow, beet and butternut squash. Next week, add that pinch of cinnamon to the sweet potato. Then ginger with the carrot.
My freezer currently has 120 veggie cubes. Took me two hours on a Sunday to make. That’s literally 60 meals. Do the math on how much time that saves versus cooking daily. Or worse, buying those tiny jars for $2 each.
Pro tip for baby food storage: Write combinations that worked on your freezer with a dry erase marker. “Carrot + ginger + apple = winner” saved me from trying to remember what made my baby do the happy food dance last Tuesday.
But here’s the thing about those smooth purees – they’re just the beginning. The real adventure in transitioning to stage 2 baby food starts when things get chunky.
From Smooth to Chunky: The Texture Transition Most Parents Get Wrong
Okay, real talk about textured baby food stage 2. The texture transition freaks everyone out. One day you’re spooning in silky smooth purees, the next you’re supposed to give your baby lumps? Sounds like a choking hazard waiting to happen.
Except it’s not. Studies on infant feeding show babies who don’t get chunky baby food recipes between 6-9 months are way more likely to have feeding problems later. We’re talking serious issues. Gagging on normal food at 18 months. Refusing anything that isn’t pureed at age two.
I watched this happen with my neighbor’s kid. Smooth purees until 11 months because mom was terrified of choking. Now the kid’s three and literally only eats yogurt and applesauce. Every meal is a battle.
Here’s how you actually do this texture progression for 7 month old baby food and beyond without losing your mind. Week one of stage 2: smooth as silk. Week two: blend a little less. Just 5 seconds less. You’ll see tiny specks. That’s good.
Week three: Add something soft to smooth puree. Overcooked rice. Three grains. Not thirty. Three. Mix it in. Your baby’s tongue will find those grains and figure out what to do.
By week four of 8 month old baby food, you’re mashing with a fork instead of blending. Still soft, but definitely textured. Think chunky applesauce consistency.
The gagging thing during stage 2 finger foods introduction? It’s going to happen. Gagging is not choking. Write that down. Stick it on your fridge. Gagging is your baby’s built-in safety system working perfectly. They gag, they cough, they figure it out.
My second kid gagged on a tiny piece of steamed broccoli at 7 months. I almost dove across the table. But I waited. Two seconds later, he swallowed it and opened his mouth for more. If I’d freaked out, he would’ve freaked out. Babies read our energy like little emotional radar systems.
Here’s a texture progression that actually works for transitioning from stage 1 to stage 2 baby food:
- First, smooth puree.
- Then slightly grainy puree.
- Move to puree with tiny soft lumps.
- Progress to thick mash with small pieces.
- Finally, fork-mashed with visible chunks before introducing soft finger foods.
Each stage takes about 1-2 weeks. Some babies doing baby led weaning stage 2 move faster. Some need more time. The point is progression, not speed.
The biggest mistake? Jumping from smooth to chunks overnight. Or worse, staying on smooth forever because one time your baby coughed. Coughing is learning. Mess is learning. This whole thing is learning.
Now let’s put it all together with easy stage 2 baby food recipes that actually make sense for real parents with real lives.
Real-World Stage 2 Vegetable Combinations That Actually Work
Forget those baby food combination ideas you see on fancy blogs. You know, the ones requiring seventeen ingredients and a degree in culinary arts. Let’s talk about what actually works when you’re trying to get dinner on the table and the baby fed before bedtime.
Here’s my go-to list of vegetable combinations for stage 2 baby food that my kids actually ate. Not tolerated. Ate. With enthusiasm.
- Sweet potato + carrot + ginger. This combo is basically baby crack. The natural sweetness hooks them, the ginger adds interest. Start with a tiny pinch of fresh grated ginger. Like, smaller than you think. Build up over time.
- Broccoli + pear + mint. Sounds weird? My neighbor thought I’d lost it. But her baby who “hated” broccoli? Demolished this combo. The pear cuts the bitterness, the mint makes it interesting. One tiny mint leaf. That’s it.
- Beet + apple + coriander. Earthy meets sweet meets slightly citrusy. Plus it’s bright pink. Babies eat with their eyes too. This organic vegetable baby food recipe converted three beet-hating toddlers in my playgroup.
- Butternut squash + white bean + sage. Protein, fiber, and flavor. The sage is optional at first, but man, it elevates this from baby food to something you’d eat. Half a leaf, finely chopped.
- Spinach + avocado + lime. Just a squeeze of lime. Transforms boring green mush into something with personality. Plus, healthy fats from the avocado help with vitamin absorption.
- Carrot + red lentil + cumin. Cook the lentils until they’re falling apart soft. The cumin adds warmth without heat. This iron rich baby food stage 2 option saved us during the 9-month sleep regression when everyone was too tired to think.
The secret to these simple vegetable purees? Start basic, then add the interesting element gradually. First time, just vegetables. Second time, tiny bit of spice or herb. Third time, normal amount.
Also, temperature matters. Room temperature or slightly warm. Not hot, not cold. Goldilocks style. Cold purees straight from the fridge? That’s how you get the disgusted baby face that becomes a meme.
Here’s what nobody tells you about homemade baby food recipes 6-9 months. Your baby’s preferences will change. Daily. The butternut squash they loved Monday? Tuesday it’s poison. Wednesday they want it again. Just keep offering. No drama, no forcing. Just “okay, more for me” and move on.
My personal rule for best vegetables for stage 2 baby food? If I wouldn’t eat it, why should they? Plain steamed broccoli with nothing? Gross. Broccoli with a touch of garlic powder and lemon? Now we’re talking.
Quick tip for budget friendly homemade baby food: Frozen vegetables work great. Sometimes better than fresh. They’re picked at peak ripeness and flash frozen. No shame in the frozen veggie game. My kids ate frozen pea puree mixed with mint all summer. Cost? Like $2 for ten meals.
The mistake everyone makes with nutrient dense baby food? Trying to hide vegetables. Don’t. Babies aren’t stupid. They know there’s spinach in that smoothie. Just serve it proudly. “Here’s your green superhero food.” They might surprise you.
Remember, every vegetable combination you try is expanding their palate. Even the failures. Especially the failures. My daughter rejected beets seventeen times. Seventeenth time? Asked for more. Kids are weird like that.
Now that you’ve got the combinations down, let’s talk about making this whole process actually sustainable.
Making Stage 2 Baby Food Prep Sustainable (Without Losing Your Mind)
Listen. Those Instagram moms with their color-coded baby food containers and labeled freezer drawers? Good for them. But let’s get real about baby food prep at home for actual humans who sometimes forget to brush their teeth.
First rule of sustainable baby food making equipment: You don’t need special gear. That $200 baby food maker? Nice to have. Not necessary. A pot, a steamer basket, and whatever blender you already own. Done.
I made 90% of my kids’ food with a $20 immersion blender from Target. Still use it for soup. Best baby food investment ever. Those fancy baby food steamers? My regular pot with a steamer insert worked exactly the same.
Here’s the Sunday routine that saved my sanity. Two hours. That’s it. Not all day. Two hours of baby food prep ideas executed efficiently.
Hour one: Prep and cook. Sweet potatoes in the oven. Carrots and beets wrapped in foil, same oven. Broccoli and green beans in the steamer. Spinach in a pot with a tiny bit of water. Everything cooking at once.
Hour two: Blend and freeze. Let stuff cool while you eat lunch or zone out on your phone. Then assembly line it. Blend, pour, next. No fancy baby food storage containers needed. Ice cube trays and freezer bags. Old school.
The key to meal planning baby food? Think combinations, not individual purees. Make six vegetables, you’ve got fifteen combinations. Math that actually helps.
Write your baby food freezer meals plan on the fridge. Not in some app you’ll forget to check. On the actual fridge. With a marker. Monday: carrot-ginger. Tuesday: beet-apple. Real simple.
Biggest game-changer for quick baby food recipes? Double batches. Making carrots? Make twice as many. Literally the same amount of work. Twice the food. Future you will send thank you notes.
Store everything in 2-cube portions for 8-9 month old baby food servings. That’s one meal. Grab, defrost, done. No measuring, no thinking. Just feeding.
Defrosting hack that nobody talks about: Put tomorrow’s meals in the fridge tonight. By morning, they’re thawed. Microwave for 15 seconds to take the chill off. Stir well, test temperature, serve.
About that baby food processor or blender debate? Doesn’t matter. Use what you have. Vitamix, Magic Bullet, garage sale blender from 1987. If it blends, it works.
Here’s where people burn out on homemade baby food. They try to be perfect. Every meal from scratch, organic everything, precisely measured. Stop that. Some meals will be frozen cubes. Some will be mashed banana. Some will be whatever vegetable you’re eating, mashed with a fork. All fine.
The 80/20 rule applies to baby food nutrition guide principles too. 80% homemade, nutritious, thoughtful. 20% survival mode. That pouch from the grocery store when you’re running late? Not failure. That’s life.
Real talk about organic baby food recipes: Great if you can afford it. But regular vegetables are better than no vegetables. Don’t let perfect be the enemy of good. My kids ate tons of non-organic carrots. They’re fine.
Batch cooking baby food only works if you actually remember to use it. Set a phone reminder if you need to. “Defrost baby food” at 7 PM. Whatever keeps you from staring at a hungry baby and frozen cubes at dinnertime.
Last thing about best tools for making baby food? The most important tool is realistic expectations. You’re not running a restaurant. You’re feeding a tiny human who might throw half of it on the floor. That’s normal. That’s learning. That’s life with a baby.
Conclusion
Here’s the truth about stage 2 baby food. It’s not about perfection. It’s about progress. Every spice you add, every texture you introduce, every vegetable combination you try – it’s all building your baby’s food future.
Will they eat everything? Nope. Will they sometimes spit out that carefully crafted beet-apple-ginger puree? Absolutely. But they’re learning that food has flavor, texture, and variety. That’s huge.
Start this weekend. Pick one vegetable. Add one tiny pinch of cinnamon. See what happens. Your future self, the one not arguing with a four-year-old about trying one bite of broccoli, will thank you.
Trust me on this one. The stage 2 veggie revolution starts in your kitchen. And honestly? It’s way easier than the internet makes it look.


